Not bad for our first time! It's super easy, try it with your superkid, you'll both be hooked! Here's how:
Buy freezer paper. You should be able to find it at your grocery store near the tin foil and cling wrap. You cannot substitute wax paper!
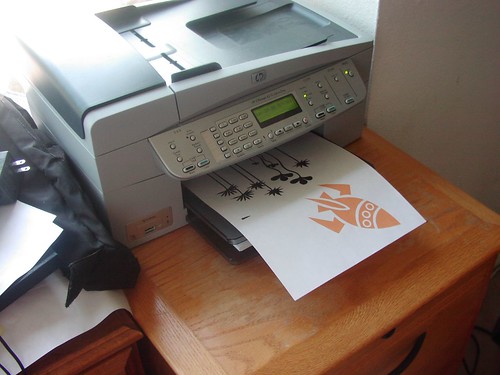
Draw your own design on the paper side of the freezer paper, or cut the freezer paper into 8 1/2 x 11 pieces and print some simple designs off your computer right on to the freezer paper. I just searched through a bunch of clip art and found some cute designs. **Edited to add: This works well on a home inkjet printer. Someone I know MAY have tried it on big printer at work only to have it get to hot and cause the freezer paper to stick to the rollers inside the printer causing a jam- not to mention the panic of trying to get it out before you have to tell the boss that you were trying to print a freezer paper stencil from the work printer. So, run freezer paper through the printer at your own risk. ** If you don't want to run it through your printer, simply print the stencil on a regular piece of paper and tape it on top of the freezer paper then cut it out.
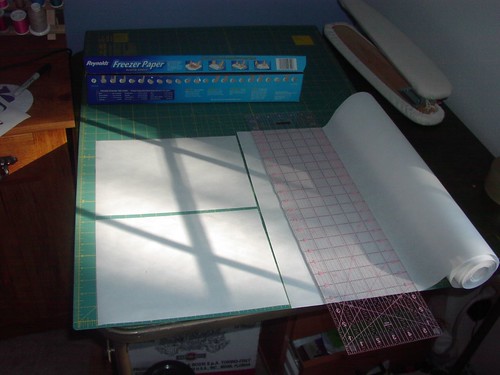
Next use an exacto knife and carefully cut out all the pieces. You can use both the inner and outer pieces to make a regular and a reverse image, so cut carefully! I got this small cutting mat to bring to work. During my down time I cut out several stencils so they were ready to go the next morning.
 Make sure you have a bowl nearby to put all the teeny tiny "island" bits in. You don't want to loose them! When I cut all my stencils out I put all the bits in one glass and they got all mixed up. Next time when I'm done cutting one stencil i will put all those pieces together in an envelope. One that isn't white, so I will be able to see the pieces easily. It's also a good idea to label the small pieces if you think you might get them mixed up.
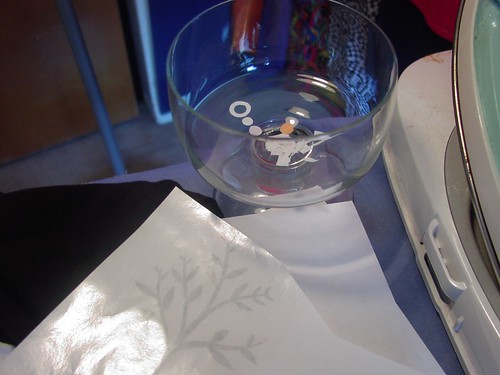 Then simply place the stencil waxy side down on your shirt, and iron on medium heat for a few seconds until it sticks. I ironed on the big piece first, then placed all the inside "island" pieces and ironed them down next.
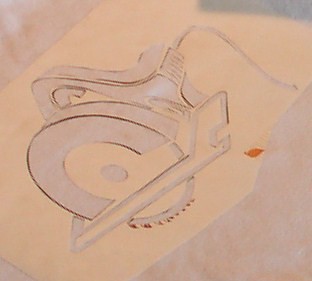 Using fabric paint (although i've heard Acrylic paint works great, too...) paint on your stencil! I couldn't find a paint brush and just couldn't wait so I used an old cosmetic brush. :-) I learned to be a little more careful around the edges, this saw came out a little rough around the edges. I think either I ironed it on too much and it didn't stick well, or I didn't iron enough, or I just gooped the paint on too much. I got a much more crisp line with the later ones where I brushed inward from the paper onto the fabric, instead of on the fabric towards the paper... if that makes sense.
 Then peel off your paper and voila!
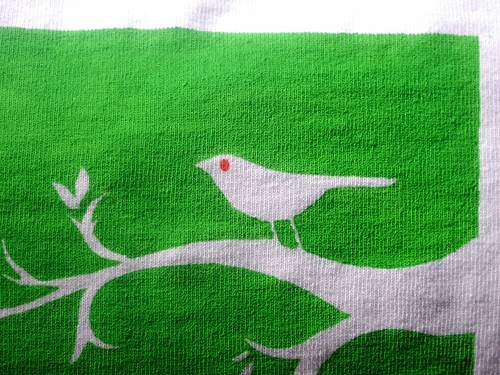
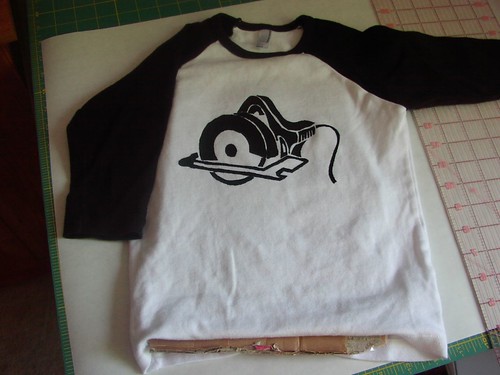 I read that you don't have to wait until it dries, although I think that for getting off some of the small pieces it would be easier to wait until it dries. I couldn't wait long enough on the guitar and the tree with the bird, and they turned out great!
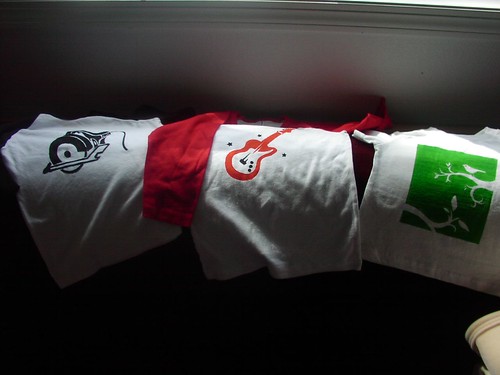
I love the crisp edges. I have several more stencils to try, plus the reverse images... now to hit garage sales this weekend and pick up more shirts! Or aprons... or hats... the possibilities are endless!
 And, if you are wondering what to do with the big 'ol roll of freezer paper (other than more stenciling, of course!) you can also use it to run fabric through your printer. Check out one of my favorite blogs, Sycamore Stirrings- she prints her kids art onto fabric, then makes pot holders!