Sunday, August 10, 2008
Win a Custom Panjo Cape!
Amanda over at A Stay-at-home Moms Point of View did a review on my capes. She's also hosting a giveaway to win one of my custom capes. Head on over and check it out! Contest closes on August 22.

Friday, August 8, 2008
Crafty Crow!
Check this out! My Freezer Paper Stencil Tutorial was featured on Crafty Crow.

Very cool! Crafty Crow is a craft collective for kids. They collect really great crafty ideas from various blogs and compile them in one place. Like a one stop shop for all you kid-crafting needs.
And, their ideas are fun and unique, and often things your kids can do with you. Like make Gak:
 Adorable Felt Clips:

And a cool cardboard kitchen:

So much inspiration, so little time!

Very cool! Crafty Crow is a craft collective for kids. They collect really great crafty ideas from various blogs and compile them in one place. Like a one stop shop for all you kid-crafting needs.
And, their ideas are fun and unique, and often things your kids can do with you. Like make Gak:
Adorable Felt Clips:And a cool cardboard kitchen:
So much inspiration, so little time!
Monday, July 28, 2008
Muffin Tin Monday
I have been so excited to start Muffin Tin Monday. It's a brilliant idea by one of my cyber-friends, Katy. I met Katy when we did a swap on Etsy- she got a cape for her son, and I got a couple of awesome shirts that she made. Since then she has closed her Etsy shop, but she now has time to make this wonderful blog- Sycamore Stirrings. She has some very inspiring ideas, one of which is Muffin Tin Monday. What a great way to remind myself to think out of the box (and into the tin...) and also to sneak in some new things for Max to try in a fun way. I even went out and bought a super cool heart shaped muffin tin. Then when I got it all put together then I couldn't find my camera! I had to use my cell phone and the color is terrible- it looks pretty unappetizing. But really it's good, promise! And Max loved it.
 carrots, grapes, peanut butter and jelly sandwiches, hot dogs, and a blueberry banana muffin
I'm going to try to do this every week. Posting it on my blog(s) will hopefully keep me thinking of more creative things to put in the tins each week.
 carrots, grapes, peanut butter and jelly sandwiches, hot dogs, and a blueberry banana muffin
I'm going to try to do this every week. Posting it on my blog(s) will hopefully keep me thinking of more creative things to put in the tins each week.
Friday, June 20, 2008
Freezer Paper Stencils
Yup, I've jumped on the bandwagon and am officially hooked on Freezer Paper Stenciling. I first saw it over on The Artful Parent, she is so hooked that she opened an Etsy shop to sell all her cute designs. I started looking around at other artsy blogs and saw how easy it looked so I finally picked up some freezer paper, an exacto knife, some of Max's plain t-shirts, and fabric paint. Here are the results:
 Not bad for our first time! It's super easy, try it with your superkid, you'll both be hooked! Here's how:
Buy freezer paper. You should be able to find it at your grocery store near the tin foil and cling wrap. You cannot substitute wax paper!
Draw your own design on the paper side of the freezer paper, or cut the freezer paper into 8 1/2 x 11 pieces and print some simple designs off your computer right on to the freezer paper. I just searched through a bunch of clip art and found some cute designs. **Edited to add: This works well on a home inkjet printer. Someone I know MAY have tried it on big printer at work only to have it get to hot and cause the freezer paper to stick to the rollers inside the printer causing a jam- not to mention the panic of trying to get it out before you have to tell the boss that you were trying to print a freezer paper stencil from the work printer. So, run freezer paper through the printer at your own risk. ** If you don't want to run it through your printer, simply print the stencil on a regular piece of paper and tape it on top of the freezer paper then cut it out.


Next use an exacto knife and carefully cut out all the pieces. You can use both the inner and outer pieces to make a regular and a reverse image, so cut carefully! I got this small cutting mat to bring to work. During my down time I cut out several stencils so they were ready to go the next morning.
 Make sure you have a bowl nearby to put all the teeny tiny "island" bits in. You don't want to loose them! When I cut all my stencils out I put all the bits in one glass and they got all mixed up. Next time when I'm done cutting one stencil i will put all those pieces together in an envelope. One that isn't white, so I will be able to see the pieces easily. It's also a good idea to label the small pieces if you think you might get them mixed up.
 Then simply place the stencil waxy side down on your shirt, and iron on medium heat for a few seconds until it sticks. I ironed on the big piece first, then placed all the inside "island" pieces and ironed them down next.

 Using fabric paint (although i've heard Acrylic paint works great, too...) paint on your stencil! I couldn't find a paint brush and just couldn't wait so I used an old cosmetic brush. :-) I learned to be a little more careful around the edges, this saw came out a little rough around the edges. I think either I ironed it on too much and it didn't stick well, or I didn't iron enough, or I just gooped the paint on too much. I got a much more crisp line with the later ones where I brushed inward from the paper onto the fabric, instead of on the fabric towards the paper... if that makes sense.
 Then peel off your paper and voila!
 I read that you don't have to wait until it dries, although I think that for getting off some of the small pieces it would be easier to wait until it dries. I couldn't wait long enough on the guitar and the tree with the bird, and they turned out great!

I love the crisp edges. I have several more stencils to try, plus the reverse images... now to hit garage sales this weekend and pick up more shirts! Or aprons... or hats... the possibilities are endless!
 And, if you are wondering what to do with the big 'ol roll of freezer paper (other than more stenciling, of course!) you can also use it to run fabric through your printer. Check out one of my favorite blogs, Sycamore Stirrings- she prints her kids art onto fabric, then makes pot holders!
 Not bad for our first time! It's super easy, try it with your superkid, you'll both be hooked! Here's how:
Buy freezer paper. You should be able to find it at your grocery store near the tin foil and cling wrap. You cannot substitute wax paper!
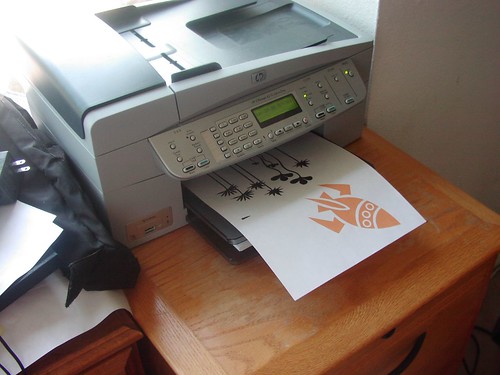
Draw your own design on the paper side of the freezer paper, or cut the freezer paper into 8 1/2 x 11 pieces and print some simple designs off your computer right on to the freezer paper. I just searched through a bunch of clip art and found some cute designs. **Edited to add: This works well on a home inkjet printer. Someone I know MAY have tried it on big printer at work only to have it get to hot and cause the freezer paper to stick to the rollers inside the printer causing a jam- not to mention the panic of trying to get it out before you have to tell the boss that you were trying to print a freezer paper stencil from the work printer. So, run freezer paper through the printer at your own risk. ** If you don't want to run it through your printer, simply print the stencil on a regular piece of paper and tape it on top of the freezer paper then cut it out.
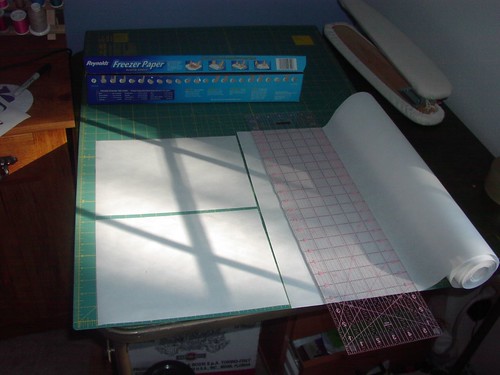
Next use an exacto knife and carefully cut out all the pieces. You can use both the inner and outer pieces to make a regular and a reverse image, so cut carefully! I got this small cutting mat to bring to work. During my down time I cut out several stencils so they were ready to go the next morning.
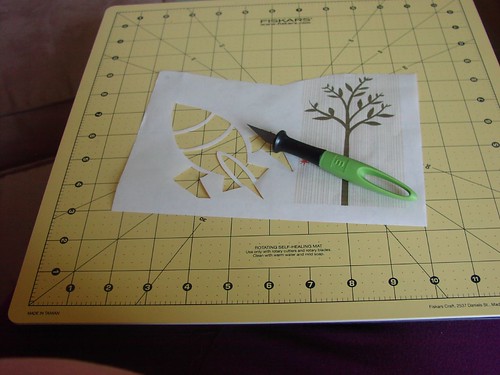 Make sure you have a bowl nearby to put all the teeny tiny "island" bits in. You don't want to loose them! When I cut all my stencils out I put all the bits in one glass and they got all mixed up. Next time when I'm done cutting one stencil i will put all those pieces together in an envelope. One that isn't white, so I will be able to see the pieces easily. It's also a good idea to label the small pieces if you think you might get them mixed up.
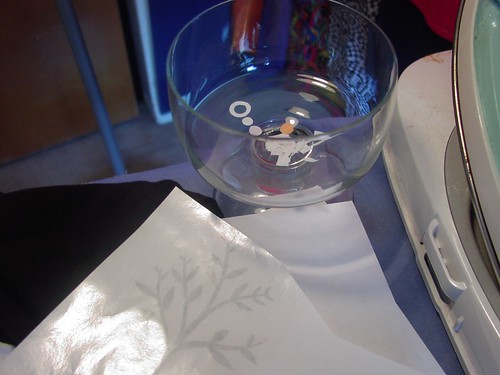 Then simply place the stencil waxy side down on your shirt, and iron on medium heat for a few seconds until it sticks. I ironed on the big piece first, then placed all the inside "island" pieces and ironed them down next.
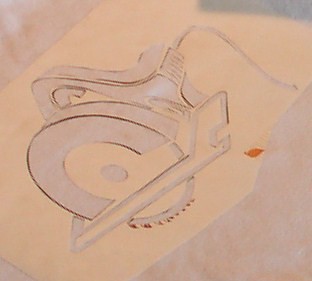 Using fabric paint (although i've heard Acrylic paint works great, too...) paint on your stencil! I couldn't find a paint brush and just couldn't wait so I used an old cosmetic brush. :-) I learned to be a little more careful around the edges, this saw came out a little rough around the edges. I think either I ironed it on too much and it didn't stick well, or I didn't iron enough, or I just gooped the paint on too much. I got a much more crisp line with the later ones where I brushed inward from the paper onto the fabric, instead of on the fabric towards the paper... if that makes sense.
 Then peel off your paper and voila!
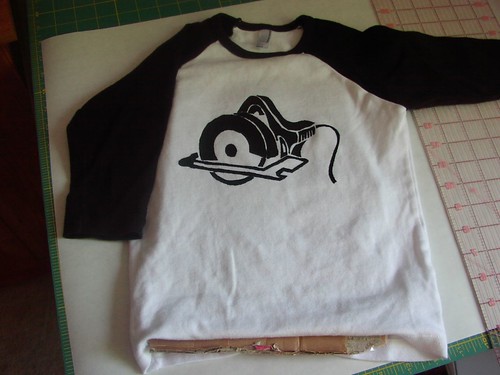 I read that you don't have to wait until it dries, although I think that for getting off some of the small pieces it would be easier to wait until it dries. I couldn't wait long enough on the guitar and the tree with the bird, and they turned out great!
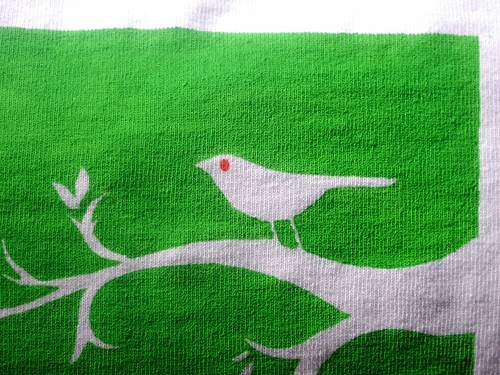
I love the crisp edges. I have several more stencils to try, plus the reverse images... now to hit garage sales this weekend and pick up more shirts! Or aprons... or hats... the possibilities are endless!
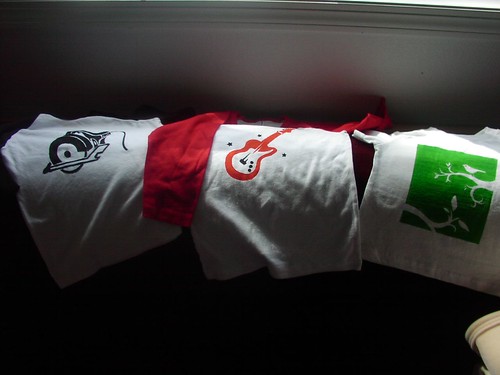 And, if you are wondering what to do with the big 'ol roll of freezer paper (other than more stenciling, of course!) you can also use it to run fabric through your printer. Check out one of my favorite blogs, Sycamore Stirrings- she prints her kids art onto fabric, then makes pot holders!
Sunday, May 25, 2008
Yee Haw!
I was so excited to see that there were new listings at Ramonster's new Etsy shop- I quickly nabbed a hobby horse (or Stick Pony, as she calls them) for Max. He's been galloping around the house lately, so I thought this would be the perfect time. It arrived in a big box, which was just as interesting for a 2 year old as the contents were. It is even better in person- the photos just don't do them justice. As a disclaimer, Ramonsters fabulous designer is Kathie Sever- my cousin. She even embroidered Max's name on the horses bandana. So cute! At first he wasn't sure what to do with it. It spent a few days just hanging out, looking cool in out living room. Then starting a couple days ago, he looks for it- saddles up, and "Yee Haw!" Off he goes!


The future craft collective is about inspiring children to get crafty, to create beauty, while simultaneously teaching them ways of minimizing our impact on this earth. It's about understanding ways of recycling, reducing, reusing, and at the same time, making some really cool stuff.

The classes that she teaches to children and adults- boys and girls- look like so much fun. It makes me wish I lived in Austin to take one myself. Or really, wish she lived in Portland. Yeah, she should move to Portland.
Sunday, February 10, 2008
Love Cape
Just in time for Valentines Day! I have one "Queen of Hearts" toddler size cape IN-STOCK. Ready to have an initial on the back and ready to ship out in time for Valentines Day. It is soooo cute! The picture really doesn't do it justice. There is gold sparkle around the hearts on the inner fabric, and the soft minkee on the outside is a wonderful luxurious swirl.


Not shopping for a 2 year old? Check out this gorgous jewelrey by my pal Chelsea at Eighty8Words.
 Happy Valentines Day!
Friday, January 18, 2008
Happy New Year!
New Years Resolution? To get this cape business a bit more organized. That means keeping up with my blog, even if it's just a photo! I've also been setting up my sewing room with new shelves, and trying to find the best way to get things in order. I want to get better photos of the capes, and fine tune the website. If I write it here in my blog then I HAVE to do it... right?

Cool Mom Picks, one of my favorite review websites, wrote a nice review of my capes- you can read it HERE.
When Mama Speaks did their review we did a giveaway for a free custom cape. The winner, Brittany, wrote about it in her blog. I have had a few customers blog about their Panjo supercapes, and many send me photos. It is so much fun to see pictures and hear stories about everyones SuperKids! One of my goals is to get a photo gallery up on the website soon.
Last week I also made the front page of Etsy... twice!!! The fabulous Katy, of Sycamore Baby got a screen shot for me. Oh! And she also is using a photo of my son Max on her site to show off her El Corazon shirt. Fun!

You might notice a few changes to my Etsy shop. I now have an "In-Stock" section where I have capes already made and ready to ship out within 2 days! Coming soon- capes big and small...really! Custom ADULT supercapes, and custom doll supercapes. There is a rockin' new gift certificate designed by the Banner Fairy, that can be emailed to you or to the gift recipient (or sent snail mail) right away. Great for last minute shopping or if you can't decide which fabric to get. I have several new fabrics, here are a few of my favorites. Oh, and I'm now offering Minkee on the solid color side for an additional cost. This is super soft, swirly, and girls just LOVE it.


That's it for now!
Cool Mom Picks, one of my favorite review websites, wrote a nice review of my capes- you can read it HERE.
When Mama Speaks did their review we did a giveaway for a free custom cape. The winner, Brittany, wrote about it in her blog. I have had a few customers blog about their Panjo supercapes, and many send me photos. It is so much fun to see pictures and hear stories about everyones SuperKids! One of my goals is to get a photo gallery up on the website soon.
Last week I also made the front page of Etsy... twice!!! The fabulous Katy, of Sycamore Baby got a screen shot for me. Oh! And she also is using a photo of my son Max on her site to show off her El Corazon shirt. Fun!

You might notice a few changes to my Etsy shop. I now have an "In-Stock" section where I have capes already made and ready to ship out within 2 days! Coming soon- capes big and small...really! Custom ADULT supercapes, and custom doll supercapes. There is a rockin' new gift certificate designed by the Banner Fairy, that can be emailed to you or to the gift recipient (or sent snail mail) right away. Great for last minute shopping or if you can't decide which fabric to get. I have several new fabrics, here are a few of my favorites. Oh, and I'm now offering Minkee on the solid color side for an additional cost. This is super soft, swirly, and girls just LOVE it.
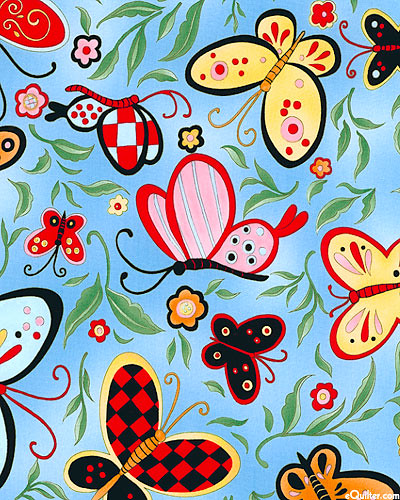




Oh, and I don't have a picture, but yesterday I got some really yummy red minkee. I'm hoping to make a couple of really fun "Love Capes" for Valentines Day. Look for them in the "In Stock" section of my shop.
That's it for now!
Subscribe to:
Posts (Atom)