
 Not bad for our first time! It's super easy, try it with your superkid, you'll both be hooked! Here's how:
Buy freezer paper. You should be able to find it at your grocery store near the tin foil and cling wrap. You cannot substitute wax paper!
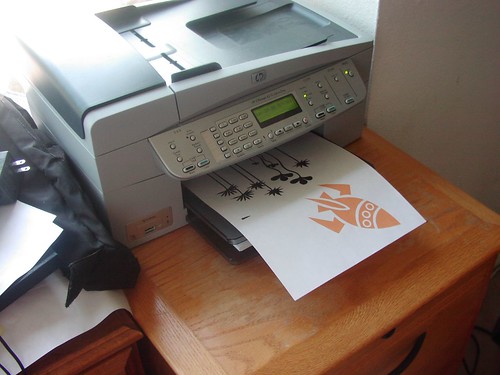
Draw your own design on the paper side of the freezer paper, or cut the freezer paper into 8 1/2 x 11 pieces and print some simple designs off your computer right on to the freezer paper. I just searched through a bunch of clip art and found some cute designs. **Edited to add: This works well on a home inkjet printer. Someone I know MAY have tried it on big printer at work only to have it get to hot and cause the freezer paper to stick to the rollers inside the printer causing a jam- not to mention the panic of trying to get it out before you have to tell the boss that you were trying to print a freezer paper stencil from the work printer. So, run freezer paper through the printer at your own risk. ** If you don't want to run it through your printer, simply print the stencil on a regular piece of paper and tape it on top of the freezer paper then cut it out.
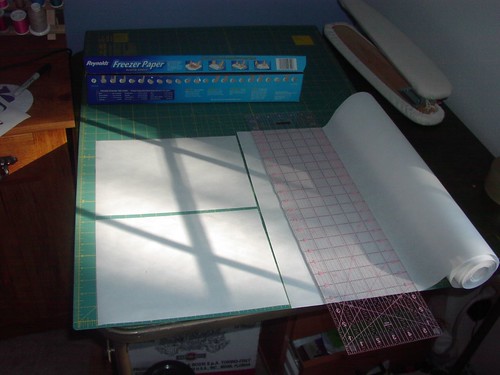
Next use an exacto knife and carefully cut out all the pieces. You can use both the inner and outer pieces to make a regular and a reverse image, so cut carefully! I got this small cutting mat to bring to work. During my down time I cut out several stencils so they were ready to go the next morning.
 Make sure you have a bowl nearby to put all the teeny tiny "island" bits in. You don't want to loose them! When I cut all my stencils out I put all the bits in one glass and they got all mixed up. Next time when I'm done cutting one stencil i will put all those pieces together in an envelope. One that isn't white, so I will be able to see the pieces easily. It's also a good idea to label the small pieces if you think you might get them mixed up.
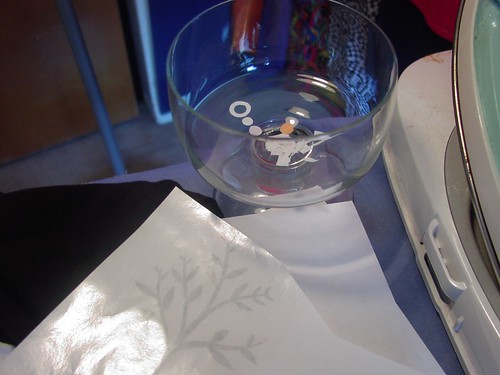 Then simply place the stencil waxy side down on your shirt, and iron on medium heat for a few seconds until it sticks. I ironed on the big piece first, then placed all the inside "island" pieces and ironed them down next.
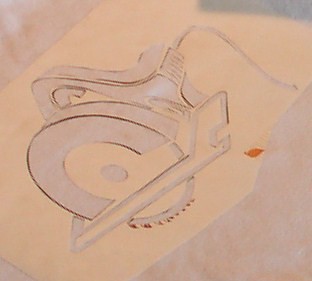 Using fabric paint (although i've heard Acrylic paint works great, too...) paint on your stencil! I couldn't find a paint brush and just couldn't wait so I used an old cosmetic brush. :-) I learned to be a little more careful around the edges, this saw came out a little rough around the edges. I think either I ironed it on too much and it didn't stick well, or I didn't iron enough, or I just gooped the paint on too much. I got a much more crisp line with the later ones where I brushed inward from the paper onto the fabric, instead of on the fabric towards the paper... if that makes sense.
 Then peel off your paper and voila!
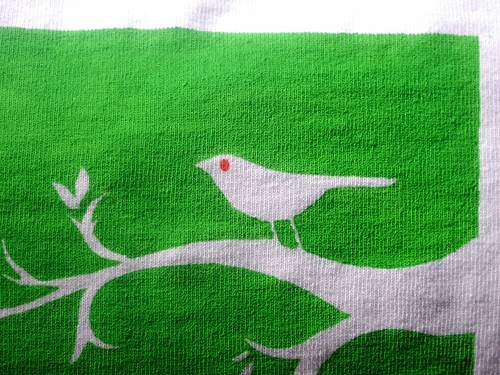
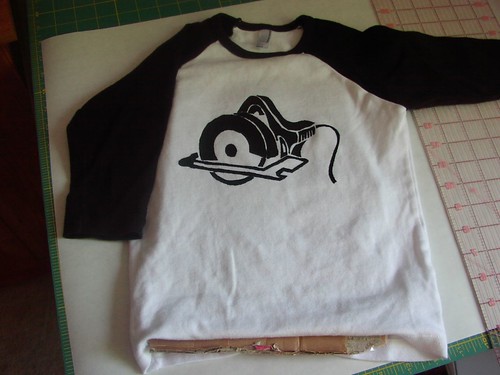 I read that you don't have to wait until it dries, although I think that for getting off some of the small pieces it would be easier to wait until it dries. I couldn't wait long enough on the guitar and the tree with the bird, and they turned out great!
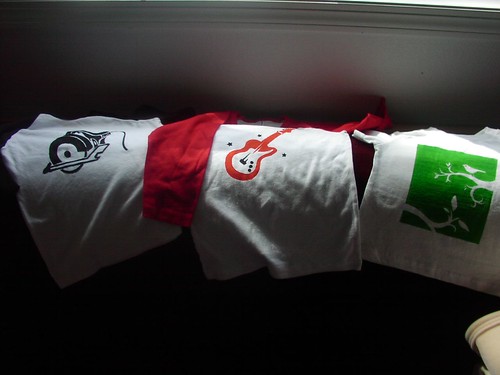
I love the crisp edges. I have several more stencils to try, plus the reverse images... now to hit garage sales this weekend and pick up more shirts! Or aprons... or hats... the possibilities are endless!
 And, if you are wondering what to do with the big 'ol roll of freezer paper (other than more stenciling, of course!) you can also use it to run fabric through your printer. Check out one of my favorite blogs, Sycamore Stirrings- she prints her kids art onto fabric, then makes pot holders!


34 comments:
Those are AWESOME Ellie!!!
Great tutorial and I love the tree and bird especially! I've had freezer paper and fabric paint for awhile but you've inspired me to actually get it out! And thanks for the ideas about running freezer paper/fabric through the printer!
that looks great! Wow, maybe something I could start doing, too... fun :) thanks for blogging about it!
Those turned out really well! I love how people are able to come up with all these creative ways to do things! It's quite impressive.
Ellie,
You are *killing* me with these shirts! They are so flippin' cute. I may have to give it a try -
thanks for the potholder shout out!
Hope you are well ~
Katy
Wow, this is amazing!
You are wayyyy too craft. I'm going to get in touch with you for September, fashion month at www.momtrends.blogspot.com
Yeah, something that those of us "sewing challenged" people can do! I am excited to give this a try and think my daughters would love to try it out too!!!
Wow! Great tutorial! I've been wanting to put stencils on the recycled tshirt dresses I've been making, but it took too long to do it freehand. I'm going to give this a try!
Learned from my mother, I use huge pieces of freezer paper as art paper for my son. It's especially great for finger paint, water colors, etc., as the wetness won't bleed through to your work surface. A LOT cheaper than those huge tablets of art paper!
These are so well done! I've tried this once before, but now I think I need to try again.
Wow! Those look SO GOOD! I totally want to try this now- great tutorial!
LOVE it all (especially the bird!) Thanks so much for sharing~
Ellie,
I'm tickled to death thinking about the possibilities. We are winding down our summer (and crying in our coffee), so this is an awesome pre-kindergarten (see, I'm losing my baby!) project that takes those slightly-stained-but-still-adorable tees into the school year. We wear short-sleeves all year over long sleeve button-downs and pullover tees - ketchup becomes a mini-racecar or rocket -rad! I posted your capes back in November and I've been a huge fan ever since! Thank you once again!
I came over here from the Crafty Crow. I love this tutorial. The other day I saw a fat roll of freezer paper at the store and was soooooooo tempted to buy it as an art supply.
I'm another one from The Crafty Crow. I'll be rummaging through my son's closet this afternoon. These designs are so cute, and I can't wait to try it. Ooh, he has a plain green apron that will be my guinea pig!
I have to ask, where did you get the design for the bird on a branch? Clip art? It is exactly what I've been looking for to paint in my daughter's room.
It's great to see so many comments! I certainly wasn't expecting the tutorial to be seen by so many people, I feel like I should probably update it with better pictures, a cleaner workspace or something! :-)
Sara- I hadn't thought about Freezer Paper for painting- especially finger painting! Great idea.
Christi- I'd love to see your post from November. I'm glad you like my capes! The stenciling is so easy, and great for the stained shirts. I have a pile ready to go, I just need to print out more patterns!
Chrissy- The bird pattern is just clip are that was in Microsoft Publisher. It's part of a larger picture with another branch and bird belot. You can see the full clip art in the last picture of this post, the green square.
Thanks again for taking the time to post, everyone! It's inspiring me to craft more and post more!
i love love love the bird!!!!! soooo freakin' cute!!! thanks for sharing!!
Hello! Somebody on my local mom's forum posted this tutorial and I just had to try it out ( I posted the results on my blog)! Your shirts look fantastic and your capes are adorable too! I'm going to add you to my blogroll so I can check back in often.
Thanks so much for posting this and for the inspiration.
~Jenn~
Pollywog in a Bog
Thanks so much for posting this. I have never seen or heard of this process. I definitely plan on trying it out and probably more thank once!!
very cool
thanks
I have the supplies and have been wanting to do this but haven't yet. I'm now inspired especially since you taught me I could feed them through the printer - genius!!!!!
That is such a cute idea. I have 2 daughters who love it when I make them one of a kinds things. So thanks for the great tutorial. I am so excited to try it out.
I love this idea! I've been looking for some cute t-shirts for me and my daughter and this is a great way to do it. Thanks for the great explanation!
hi :)
Your shirts are really cute!
I have a question...
My mom got some freezer paper from the butcher shop. It's a different color that the freezer paper you use. Do you know if that pinky-brown paper from the butcher will work?
Thanks so much!
Leigh-Ann
FreckledNest@gmail.com
Hi. I live in the Philippines and I've never seen freezer paper sold here. All we got are wax papers which you said couldn't be used for this purpose. Any idea what I can use instead? I really want to try this.
What a great idea to run it through the printer. It is such a simple idea that I almost feel sheepish that I hadn't thought of it. Your great. Keep up the great work!
What a great idea to run it through the printer. It is such a simple idea that I almost feel sheepish that I hadn't thought of it. Your great. Keep up the great work!
Love the reverse image for the bird, and the idea to run the freezer paper directly through the printer - great idea! I've added your suggestion to the instructions on my blog!
http://paintingpinkpajamas.blogspot.com/2009/06/tutorial-making-one-of-kind-t-shirts.html
WOW, Great Idea. Thanks for sharing.
~ ~Ahrisha~ ~
There is obviously a lot to know about this. I think you made some good points in Features also.
Hi there... sorry, I'm an Aussie and we don't have 'freezer paper'. Well maybe we do, but I don't know what it is! Could you please describe it to me so I can see if maybe we call it something else? This tutorial looks really fun and I'd love to try it!!!
Freezer Paper is regular paper on one side, and a lightly waxed surface on the other side. It's like what you might get at the butchers to wrap fish or meat in. Hope that helps!
Post a Comment